Pay in installments of $6.46 with
![]() ,
,
![]() and
and
![]()
Shipping Estimate
USA
- USA
- CAN
- USA
- CAN
Ships within 48 hours · Estimated delivery Jul 3 - Jul 8
For Your Every Summer RSVP, with Code: SUMMER15
Description
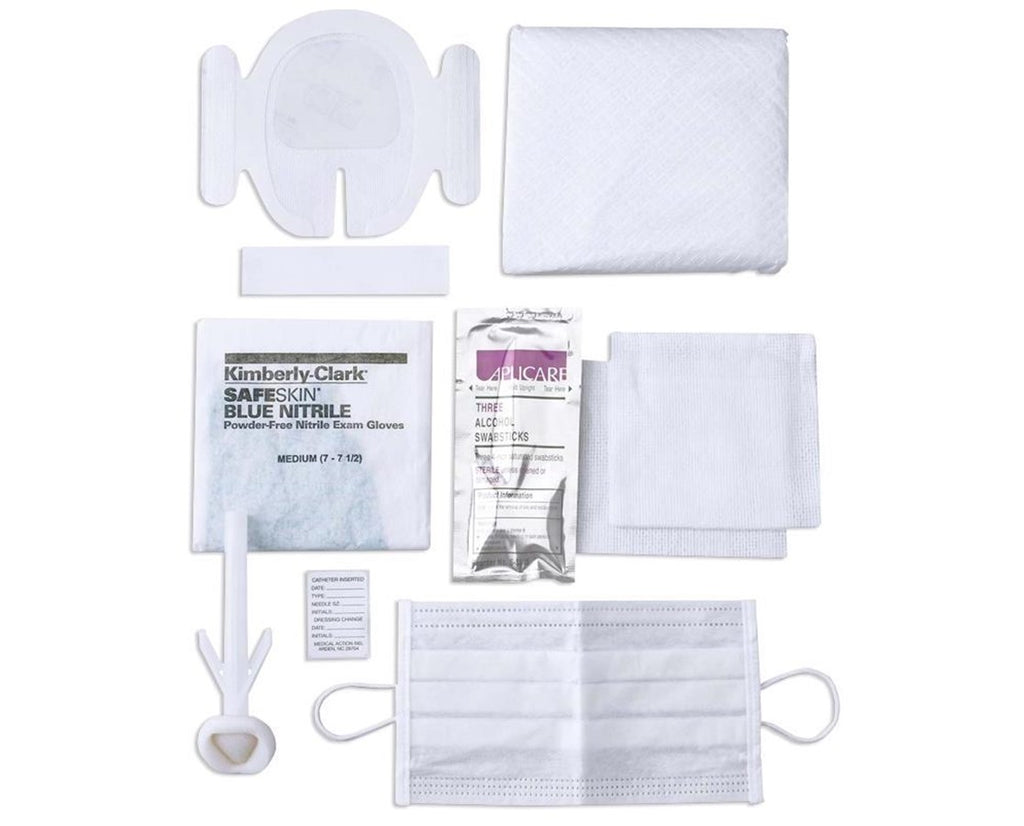
how to change central line dressing Medical Action Central Line Kit. Save at Tigermedical — Tiger MedicalMaximum barrier kit to prevent infections For catheter insertion and removal Made of high quality materials Easy to use . The Central Line Kit from Medical Action Industries is a complete set of sterilized, high quality materials that creates a more substantial barrier to prevent infections. The standardized kit tray also allows physicians, PAs, nurses, and other clinical staff to follow prescribed protocols more efficiently. A maximum barrier is
- Maximum barrier kit to prevent infections
- For catheter insertion and removal
- Made of high quality materials
- Easy to use .
The Central Line Kit from Medical Action Industries is a complete set of sterilized, high-quality materials that creates a more substantial barrier to prevent infections. The standardized kit/tray also allows physicians, PAs, nurses, and other clinical staff to follow prescribed protocols more efficiently. A maximum barrier is crucial to the "central line bundle" of clinical procedures to dramatically minimize the incidence of infection associated with catheter insertion and removal.
This kit includes high-quality surgical draping, gloves, masks, head covering, and other infection-prevention components. Each kit is thoroughly sealed to ensure its sterility. It uses the least amount of packaging to reduce environmental footprint and minimize storage requirements. The standardized kits feature supplies and instruments from industry-leading manufacturers such as C.R. Bard, 3M, and Johnson & Johnson, known for their superior quality and utility.
With its high-quality materials and convenient packaging, the Medical Action Central Line Kit improves the safety of the clinician and helps them achieve consistent clinical outcomes.
Product Options:
- Central Line Kit with Tegaderm 1626 and CHG 3mL, 20/cs (32 cs/plt) (262808)
- Central Line Kit with Opsite IV3000 and CHG 3mL, 20/cs (262811)
- Central Line Kit with Tegaderm 9836 and CHG 3mL, 20/cs (262822)
- Alcohol Triple Swabstick, Chloraprep Antiseptic Tegaderm 1626 Dressing w/tape, 4x4 4-ply, Gauze Sponge, Nitrile Exam Gloves, Dressing Change Label, Mask with Ear Loops, 1x4" Transpore Tape, 17"x19" Wrap, White, 20/cs (262834)
- Alcohol Single Swabstick, Chloraprep Antiseptic 3mL, Tegaderm 1655 Dressing w/tape, 6" Cotton Tip Applicator, 2x2" 4-ply Non-Woven Gauze, 4x4" 8-ply Gauze, Nitrile Exam Gloves, Dressing Change Label, Mask with Ear Loops, .75 x 24" Transpore Tape, 17 x 19", Wrap, White, 20/cs (262839)
- Alcohol Swabstick, CHG, Nitrile Exam Gloves, Dressing Change Label, Mask with Ear Loops, Transpore Tape, 20/cs (56975C)
- Alcohol Triple Swabstick, Chloraprep Antiseptic 3mL, Tegaderm 1655 Dressing w/tape, 4x4" 4-ply Gauze Sponge, Pair Nitrile Exam Gloves, Dressing Change Label, Mask with Ear Loops, 1x4" Transpore Tape, 13x18" 2-Ply Towel, White Paper Poly Towel, 20/cs (57181)
- Deluxe Central Line Kit with J&J BIOPATCH and Tegaderm 1655, 20/cs (57442)
- Tyvek Top, Chloraprep Antiseptic 3mL, Tegaderm Securement Dressing, 3.5" x 4.5", Nitrile Medium Purple Exam Gloves, Dressing Change Label, Mask with Ear Loops, Wrap, 17 x 19", Blue/ White, 20/cs (58443B)
- Tray, Split Non-Adherent Pad, Transpore Tape, Single-Ply Poly-Tissue Towel, Vinyl Exam Gloves, Mask, Single Swabstick, Tegaderm 1626, 8-Ply Gauze, Triple Swabstick, Povidone Iodine Ointment, 20/cs (61349)
- Single Swabstick Alcohol, BIOPATCH Dressing, ChloraPrep Antiseptic, 3mL Applicator, Tegaderm Cloth Frame Dressing, 4-Ply Gauze Sponge, Non-Latex Gloves, Dressing Change Label, Mask, 2-Ply Towel, 20/cs (69112)
- Tegaderm Dressing, 3"x3" 12-ply Gauze, Biopatch w/Change, Skin Protectant Swab 1, Chloraprep 3ml, 13"x18" 2ply Folded Towel, 1"x18" Transpore Tape, Vinyl Glove, Mask w/Earloop, 20/cs (69742B)
- Tyvek Top, Carton Label, 4" x 4" Dressing, 2" x 2" 4-Ply Gauze, Chloraprep Antiseptic 3mL, ¾" x 18" Transpore Tape, Mask with Earloops, Nitrile Gloves, 17" x 19" Towel, 20/cs (71668)
- Central Line Kit Includes: Tape Measure, Chloraprep 3ml, Nitrile Glove, 17" X 19" Blu/Wht Wrap, Mask with Earloop Folded, 20/cs (59909)
Simply select from the menu above and click "add to cart" to order today.
WARNING: This product can expose you to chemicals known to the State of California to cause cancer. For more information, go to www.P65Warnings.ca.gov.
Shipping Notes
- Free Standard Shipping on $100+ Orders to the USA.
- Except Preorder products are shipped in 48 hours.
- Delivery to the USA:
- Standard Shipping : 3-10 business days
- If time is of the essence, please consider selecting expedited delivery for faster service.
Exchange/Return Notes
- We offer a 30-day return/exchange service after receiving.
- Final sale items are not eligible for returns or exchanges.
- To process your return/exchange, please contact us at [email protected]
- Please click here for more details>>> Return & Exchange Policy